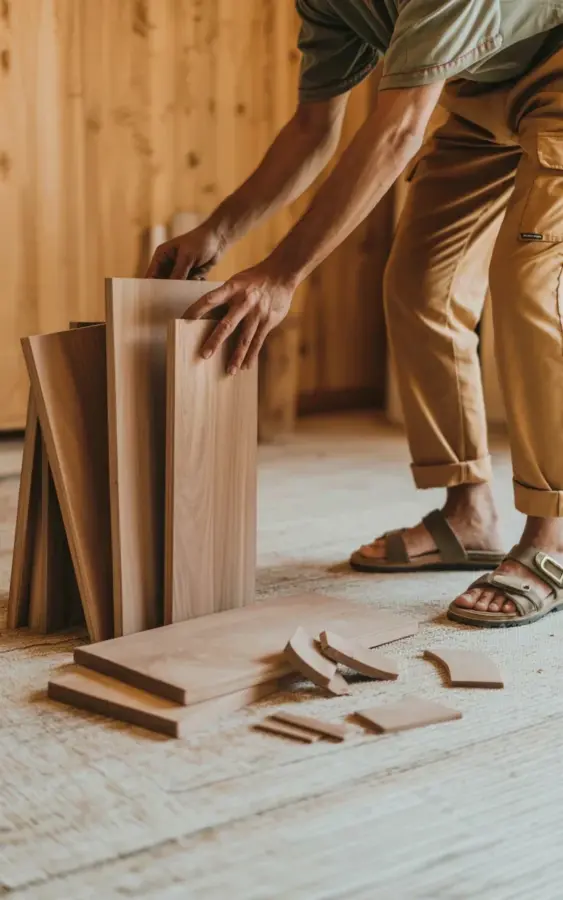
I snapped this photo while gathering supplies for my latest weekend project, and I think it perfectly captures that cozy workshop energy I love. Those unfinished wooden boards stacked on the light floor, the natural grain catching the warm afternoon light, even the little wood debris scattered around from my last cut. You can see a hand in tan pants and brown sandals reaching for the next board, ready to start building. If you are new to DIY and have no idea where to begin with raw lumber, do not worry. This is exactly the place to start, and I am going to walk you through everything I wish I had known the first time I picked up a plank.
Why I love starting with unfinished wood for home projects
Most people walk right past the bare wood section at the home center because they do not know what to do with it. I get it. It looks rough, sometimes has a few splinters, and the surface is not smooth like those pre-finished shelves. But here is the real secret: raw boards give you total control. You can stain them exactly the color you want, keep them natural for that light Scandinavian feel, or even whitewash them. The light floor in my garage (it is actually leftover vinyl plank from my kitchen) shows off the raw wood tone so well, and that wood wall behind me is just plain pine boards I nailed up last fall. No fancy finish, just clear wax. That is the cozy vibe you get from natural wood.
How to choose the right unfinished wooden boards for a DIY beginner
If you are standing in the lumber aisle feeling overwhelmed, start with the softwoods. Pine and poplar are cheap, easy to cut, and take stain or paint beautifully. That stack in my photo is mostly common pine, around 1×6 inch boards. They are light, not too heavy to carry, and you can find them at any big box store. Look for boards that are flat, not twisted like a potato chip. Run your hand along the edge to check for rough splinters. Small cracks at the ends are normal, but avoid boards with big knots that look loose. I always buy one extra board, because I will mess up a cut (and I do, every single time).
Preparing your workspace: setting up a light floor and simple backdrop
You do not need a fancy workshop. Look at the photo again. The light floor is just clean, smooth plywood or vinyl. That is enough to keep your boards from soaking up dirt. The wood wall in the background is simple tongue and groove boards, but you could work against a plain wall just fine. Key tip: sweep or vacuum before you lay down your lumber. Tiny bits of debris will dent the soft wood if you step on them. I learned that the hard way when I found a little stone pressed into the underside of my favorite shelf. Also, make sure you have good lighting. That warm natural light in the picture is ideal, but a work light or clamp lamp works too.
Essential tools for working with raw wooden boards (no prior experience needed)
You do not need a full woodshop. Here is my short list of what actually matters for a beginner:
- A handsaw or a jigsaw: A jigsaw is easier for straight cuts on thin boards like these. Watch a two minute video on YouTube before cutting.
- Sandpaper in two grits: 80 grit for rough edges, then 120 grit for a smooth surface. Sand with the grain, not across it.
- A simple measuring tape and pencil: Measure twice, cut once. Yes, it is a cliché, but it is true because your first cut will be crooked if you rush.
- Wood glue and a few clamps: Even if you are just making a simple shelf, glue the joints. Nails alone will wiggle loose over time.
- A damp cloth: Wipe off sawdust before applying any finish. That debris you see on my floor? Wipe it off your boards before you seal them.
Simple DIY project ideas using unfinished wood boards
Maybe you saw this photo and thought, “I want that warm wood wall in my living room.” Start small. A floating shelf from a single board is the perfect first project. Just cut your pine board to length, sand it smooth, and attach two simple metal brackets. Or try a wooden tray for your coffee table: cut four pieces, glue them into a rectangle, and add a bottom panel. I made a little catch-all tray that sits by my front door, and it took less than an hour. For a bigger challenge, use several boards to build a crate or a small bench. The light floor in my space makes the wood pop, so consider using a light colored rug or flooring underneath your piece to mirror that effect.
Cleaning and finishing bare wood for a cozy home look
Once your board is cut and sanded, you have to decide: leave it unfinished or give it a light coat. Unfinished wood shows every fingerprint and stain. If you want that natural look but still want protection, use a clear matte polyurethane or a simple oil like danish oil. Wipe it on with a cloth, let it soak in for 15 minutes, then wipe off the excess. The warmth of the wood grain will show through, just like in my photo where the natural light creates those subtle shadows under the boards. For a more rustic feel, apply a thin coat of whitewash (mix white paint with water 50/50) and wipe it off immediately. Do not use a thick gloss. It will look like plastic and kill the cozy vibe.
Why the little details matter: wood debris, sandals, and real working life
In the picture, you see small cut wood debris near the main boards. That is not mess, it is progress. Do not stress about keeping everything spotless while you build. Real DIY has sawdust on your pants and maybe a little pile of scraps at your feet. The person reaching for the board in those tan pants and brown sandals is wearing comfortable clothes, not a fancy apron. That is how you should work. Start with a small project, make a little mess, clean it up later. The cozy workshop vibe comes from the fact that you made something with your own hands, not from perfect cleanliness.
That stack of unfinished wooden boards is still sitting in my garage, waiting for my next build. I have already used two of them to make a simple key holder and a small display shelf for my kitchen. The natural grain and the warm light floor make each piece feel like it belongs in the room, not like a store bought item. If you want that same feeling in your home, grab a few boards this weekend. Start with one shelf, and see where it takes you. I would love to see what you create, so share your finished project with me when you are done.
#DIYwoodworking #woodenboards #homeprojects #naturalwood #cozyhome
Leave a Comment