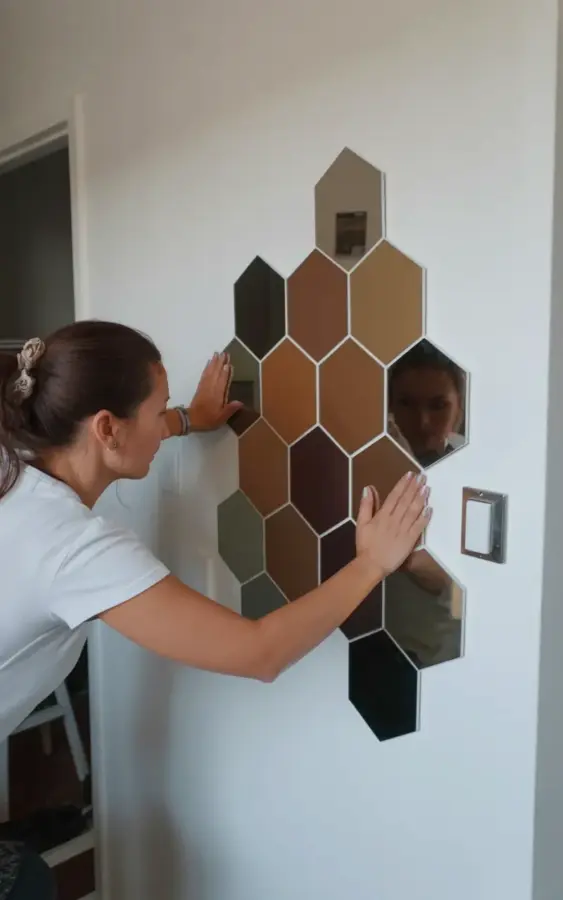
My arm was starting to ache, but I could not stop. The white wall in front of me was slowly turning into something much better. I was pressing hexagonal mirror tiles onto it in a diagonal honeycomb pattern, and honestly, I was shocked at how easy this project turned out to be. You can see it in the photo: me in a white t-shirt, hair tied back, leaning forward to press each tile into place. That light switch on the right side? It survived the whole process. So did my sanity, which I did not expect.
Now here is a small confession. I spent months staring at Pinterest boards full of hexagon mosaic bathrooms and geometric feature walls, convinced I would mess it up. The reality? Two afternoons, one tube of adhesive, and a whole lot of patience. If you are even slightly handy, you can do this.
Why I Chose Brown and Bronze Mirror Tiles
I looked at standard silver mirror tiles first. They were beautiful, sure, but they felt cold. My living room has warm wooden furniture and a lot of natural light, so I wanted something that would glow instead of glare. The brown and bronze shades in this set caught my eye immediately. Each hexagon has a different depth of colour, from deep amber to light champagne. The mix makes the wall look almost textured, even though the surface is completely flat.
Another reason I went with brown and bronze for this hexagon mosaic? It hides fingerprints. Let me just tell you, a standard mirror shows every single smudge. The darker tinted ones forgive a lot more. That matters when you have kids. Or a cat. Or both.
What You Need Before You Start
Gather everything before you open the tile boxes. Nothing kills momentum like hunting for a dry cloth in the middle of your project. Here is what I actually used for these DIY mirror tiles:
- Hexagonal mirror tiles (mine came in a pack of mixed brown and bronze shades)
- Wall adhesive made specifically for mirrors, not the cheap all-purpose stuff
- A notched trowel or a strong squeegee
- A level and a measuring tape
- Clean, lint-free cloths
- A pencil and painter’s tape for marking
- Gloves, because your fingers will thank you later
I did not use a tile spacer. The honeycomb pattern creates its own gaps when you hold each hexagon against its neighbour. That felt wrong at first, but it worked out perfectly. The tiles line themselves up if you pay attention to the angles.
Leave a Comment